An Org-travaganza

I’ve been neglectful.  Well, really only of the blog… I’ve been totally rocking it in life and at work!  Mike, Phoebe and I went camping this weekend with his friends and their two insanely smart kids, while Gus went to play with his friends at Camp Bow Wow (he was on his best behavior there, unlike last time!).  It was so nice to have some time to de-stress, which is exactly what I did amongst all the corn.  Seriously, there was corn for miles!

photo-6And because I’ve been so busy this week at my new job, I’ve missed blogging.  So I’m jumping in with both feet this weekend to tackle a huge organization project… an org-travaganza, if you will.  But first, let me introduce you to the project at hand.  My craft room/closet.  My Achilles heel…

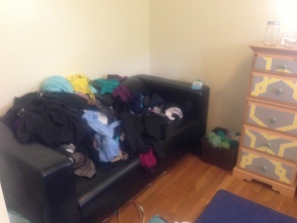
Please don’t judge me on the sheer craziness happening in this room.  I figured that cleaning before taking pictures and a video would constitute cheating.  So I snapped the room as/is.  Since I’ve kept this shame of mine hidden for so long, you might only recognize the dresser.  If you can’t watch the video above, just take a quick gander at the train wreck in picture form below:

What we have here is a catch-all room.  As in, anything that looks like it could be mine and doesn’t have a home just gets thrown in.  But it never gets viewed by friends, since it’s upstairs and the door is always kept closed.  So why bother fixing it up?  Well, it’s reached the point where it’s making me absolutely crazy.  I have no real designated place in the house to do schoolwork, craft/sewing projects, or to just get ready for the day.  And since we’ll be staying in the good ol’ Greater Akron area for the long weekend, now seems like the perfect time to get started!

I will update you this weekend on everything that goes down.  Whether I post 5 times a day, 1 time a day, or only once this weekend is still to be determined… I predict it’ll be based on how crazy this project ends up making me.  But either way, the big reveal will be on Monday, and I personally cannot wait to see how it’s going to turn out!

Anyone out there tackling organization projects this weekend?  I want to see some pics (bonus points if your “before” pictures are even more disorganized than mine!)!

Xo, Laura

Liebster Nomination!

I woke up this morning in a great mood, but it was somehow made even better when I found out that Jen of Eat, Drink and DIY nominated me for a Liebster Award!

LiebsterAward_3lilapplesI was so giddy, I woke Mike up to show him.  Basically, a Liebster is a creative way for bloggers to give a pat on the back to up-and-coming bloggers!  You can read all the details for yourself on Jen’s post.  A very big thank you to her for the nomination, and a huge congratulations on her own accolades!  Despite how rewarding blogging is, it’s still a lot of work, so it’s always nice to hear that someone else appreciates what you do!  I am so grateful for my nomination, and I’m thrilled to be able to spread the Liebster love to 10 other blogs, which I absolutely LOVE!  So without further ado, my Top 10 (please don’t lament if your blog did not make the list – it probably means you have TOO MANY followers, so congratulations!  For more Liebster rules, keep reading.):

  1. Every Home is a Castle
  2. The Belle of Beechmont
  3. Mommy MoonBlossom
  4. Susan’s Musings
  5. Creative Blossoming
  6. PB and Jabbers
  7. Life in Positudiness
  8. Nicks Knacks
  9. Girl with a Camera
  10. Simply Style

Before I dive into a Q & A session, I’d like to quickly run through the rules of Liebster nomination for my Top 10:

  • Thank the person who nominated you and link back up to his/her blog.
  • Answer the 10 questions which are given to you by the nominator.
  • Nominate 10 other bloggers for the award who have less than 200 followers.
  • Create 10 questions for your nominees to answer.
  • Let the nominees know that they have been nominated by going to their blog and notifying them.

So now I suppose I should answer the 10 questions asked by Jen from Eat, Drink and DIY.  I’d LOVE to hear how YOUR responses differ/corroborate mine, so please drop me a comment (continue reading to see what questions I ask of the 10 I nominate!)!

  1. What is your favorite blog and why? – Sugar & Cloth makes me oh so happy!  I love how the clean, simplistic layout makes it easy for blog viewing, and the content is just so fun, happy, and inspiring!  I am amazed with what she’s done, and her energy level must be absolutely through the roof!
  2. What was the inspiration for your blog? – This song:  Honestly, I was not much of a blog reader before I began blogging in May.  The only blog I had even heard of was Young House Love.  At the time, I was (and still am!) a full-time grad student working part-time on a Graduate Assistantship (also true today!), and commuting over an hour each way to spend time with my handsome man.  We decided to move in together closer to The University of Akron, but couldn’t find any homes that were up to my standards.  I was getting pretty bummed after looking at a house that looked older than Don Draper.

    I told Mike that I definitely would not be renting that house.  And then I woke him up that same night to tell him that I’d decided that we should rent it, because I was planning on fixing it up and blogging about it.  It all sounds so fortuitous and romantic, and it was!  But also, I wake Mike up almost once a night with crazy brainstorms I’ve had, so it was also kind of the norm for me.  The name ‘Makeshift Living’ came about because I wanted to showcase temporary decorating ideas with our own flare.  The M in Mike became ‘Makeshift,’ and the L in Laura became the ‘Living.’ And thus, my most favorite creation to date was born.

  3. How do you define success? – I think that success is the ability to be really good at doing what you love.  Being really great at something you hate doing is unbearable, and can’t lead to success.  But loving what you do and then somehow being able to thrive at it?  Success.  In the words of Charlie Sheen, “I’ll be over here, like, WINNING.”
  4. What is your favorite emergency meal? – Mike’s is definitely peanut butter and my dad’s honey.  On crackers, bread, or just on a spoon.  Peter B’s honey just doesn’t last long around these parts.  But I’m going to go with Mini Babybel cheeses.  I love ALL cheese, and almost always have a bag of Babybels on hand for “emergency” midnight snacks.
  5. What is the one thing you can’t live without in the kitchen? – Organization.  There is no worse feeling than not knowing where your knives are, or losing Tupperware lids!
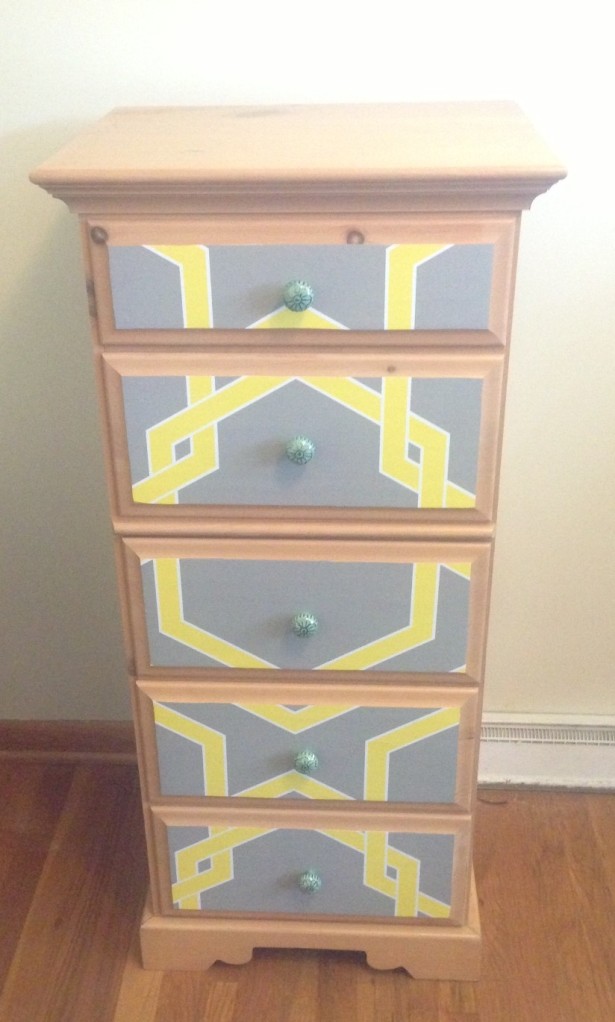
  6. What is your favorite thing you’ve done to improve your home? – I feel most proud of my re-vamped dresser.  I remember picking it out at Gene’s Furniture with my parents, and I’m so happy that I was able to make it work in my own home!
  7. Where do you feel most at home and why? – Home is where ever I’m with Mike! 
  8. What is something on your bucket list that you’d be most disappointed if you didn’t accomplish? – Skydiving!  I know that it makes Mike nervous, so I’m not sure when I’ll tackle this bucket list item.  But I’ve always thought that I would absolutely love it!
  9. What’s your favorite cocktail? – My favorite is Mike’s dad’s Whiskey Sour recipe.  So delicious!  Only slightly dangerous!
  10. What is the best bargain purchase you’ve made recently? – I am answering this one for Mike… he gave me the BEST early Christmas present EVER two weeks ago, when he bought me a Felt Café 3 bike.  Phoebe and I have never been so happy! photo (21)

And now my questions for my Top 10!

  1. Why did you start blogging?
  2. What three positives does blogging bring to your life?
  3. What hopes do you have for your blog?
  4. Of what are you most proud?
  5. Where do you shop the most?
  6. You have $10 to spend on Amazon.  What do you buy?
  7. What crafting tool can you absolutely not live without?
  8. What’s your go-to recipe when you’re almost too tired to cook?
  9. Would you choose undying love or unlimited funds?  Why?
  10. Do you have any pets?  Please share a picture of your furbaby!

I’m so happy with my Liebster nomination that I could just about burst!  Hopefully my Top 10 is as well! :-)

Xo, Laura

Did you love this post?  If so, check out the following awesome links!

All Dressed Up

I love my new dresser!

image (57)

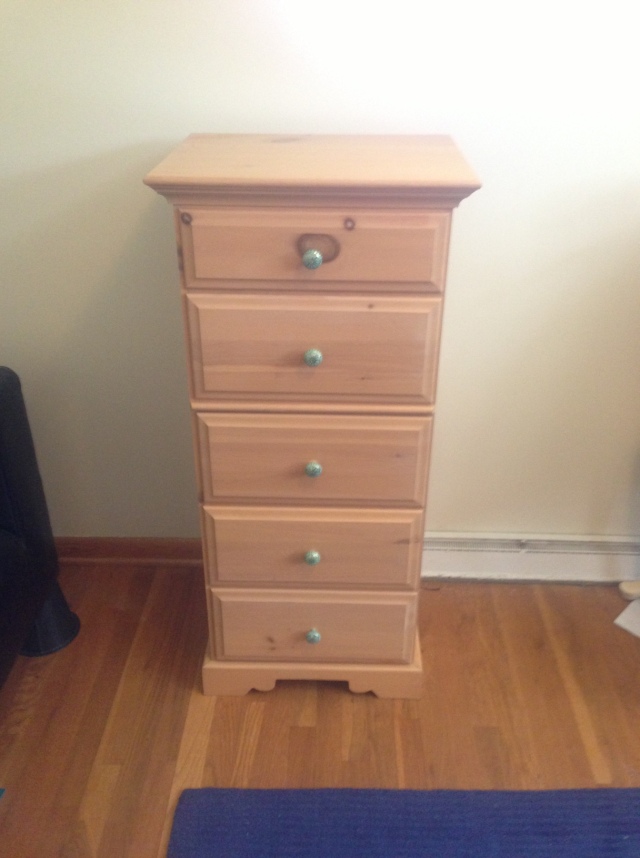
Okay, so it’s not exactly new… My parents bought it for me when I was 13, and my dad stained it the natural shade it still boasts today.

photo (17)

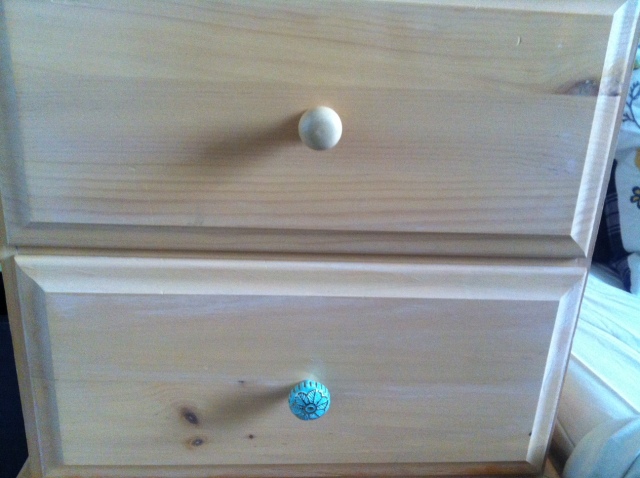
After 14 years, I was getting a little bored with it, and replaced the plain wood knobs for some teal/gold ones I’d found  on clearance at Pier 1 about a year ago.

photo (20)

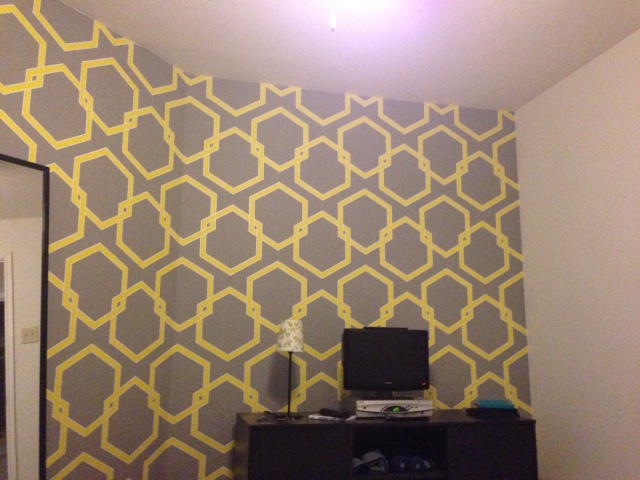
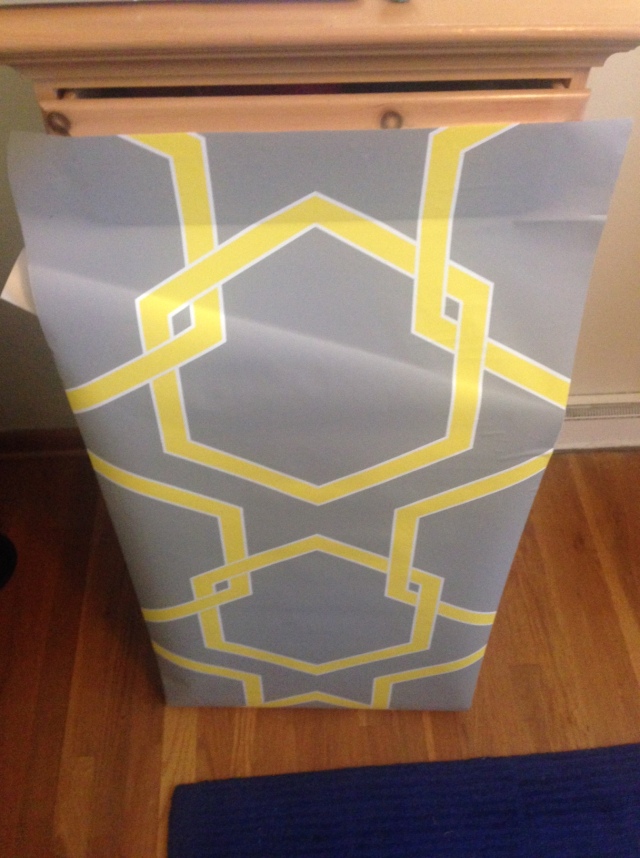
I knew painting or staining the whole dresser darker would be much more work than I wanted, but I think it’s something I’m going to cave and do in the next few years.  So in the meantime, I thought a fun, temporary solution was just what it needed!  I had some temporary wallpaper laying around from Tempaper’s 2012 Honeycomb Citron collection, which I’d had on the walls in my old apartment.

photo (19)

It went up on the walls relatively easily, and came down in about 5 seconds without leaving a single mark on the walls.  I decided to trust my dresser to Tempaper as well.

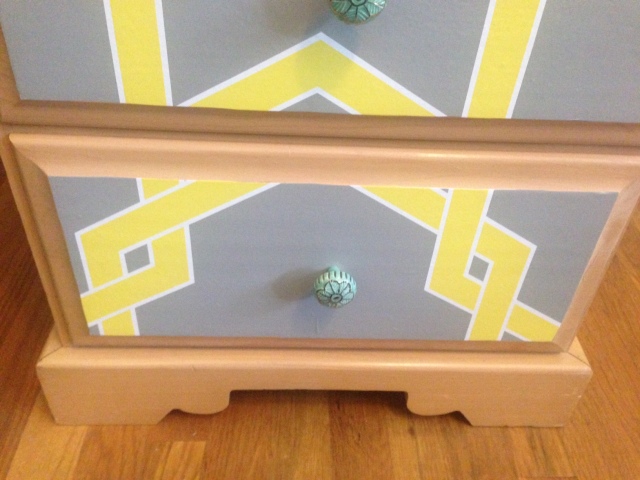
After unscrewing the knobs and setting them aside, I started by unrolling the paper.  I wanted the pattern to look continuous despite being broken up by the space between each drawer, so instead of measuring and cutting first, I simply stuck the paper on the top drawer.

image (53)

To get clean cuts, I first indented the paper on the edge of the drawer front, which is a little difficult to see, thus the added arrow:

image (2)Where ever those creases are, you’ll need to cut with either scissors or an X-acto knife.  If using an X-acto knife, make sure you go slowly and apply very little pressure; otherwise, you risk putting cuts in the wood.

image (55)In the above photo, you can see that the lower left hand corner of the paper is a little bit uneven.  This is easily prevented by moving a little slower with the razor, or can be easily fixed by going back over it one more time.

This project is very easy, and really only requires a bit of patience (to straighten out the paper, smooth out the air bubbles, and cut evenly). When you’ve finished applying the paper, the knobs can very easily punch through the now-covered holes.  If you experience any resistance, try starting a tiny hole with your scissors or razor.  And then you are left with a clean-looking, finished product!

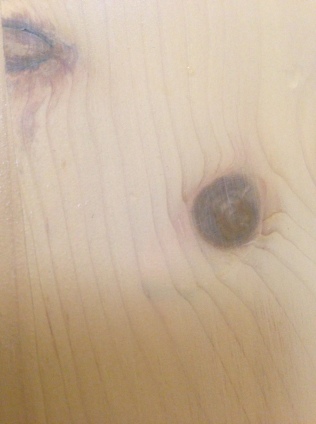
photo (18)The best part is that the knotty wood can still show through on the sides; perfectly wedding country-style with a modern, eclectic twist!

I love it!  What do you think?

image (57)

Xo, Laura


Did you love this post?  If so, check out the following awesome links!

Seriously, How Great Are Fridays?!

Can’t you just feel the happiness in the air today?!  Fridays are always amazing, but this Friday is particularly fantastic, as I have just transitioned into a new role at work, which I think will fit me like a glove.  And I get the whole weekend to celebrate with the love of my life! :-)

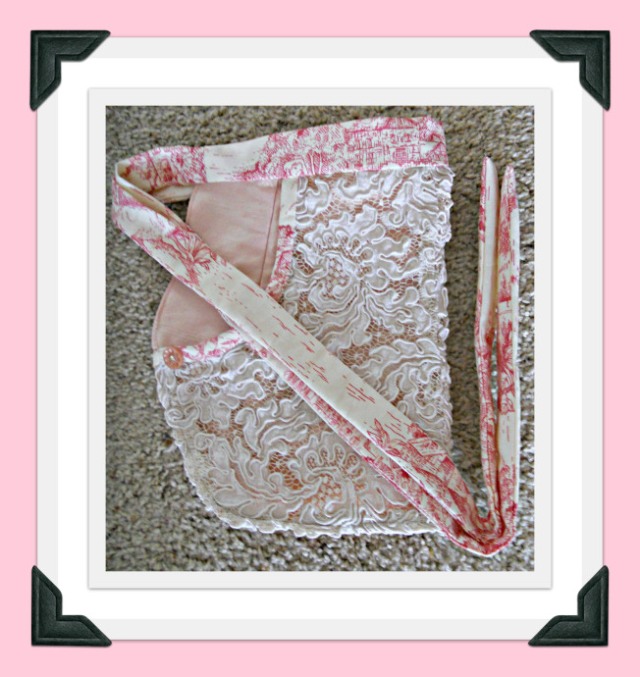
I’ve also just won this beautiful apron made by Katherine of Pillows A-La-Mode!

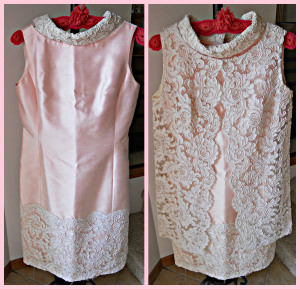
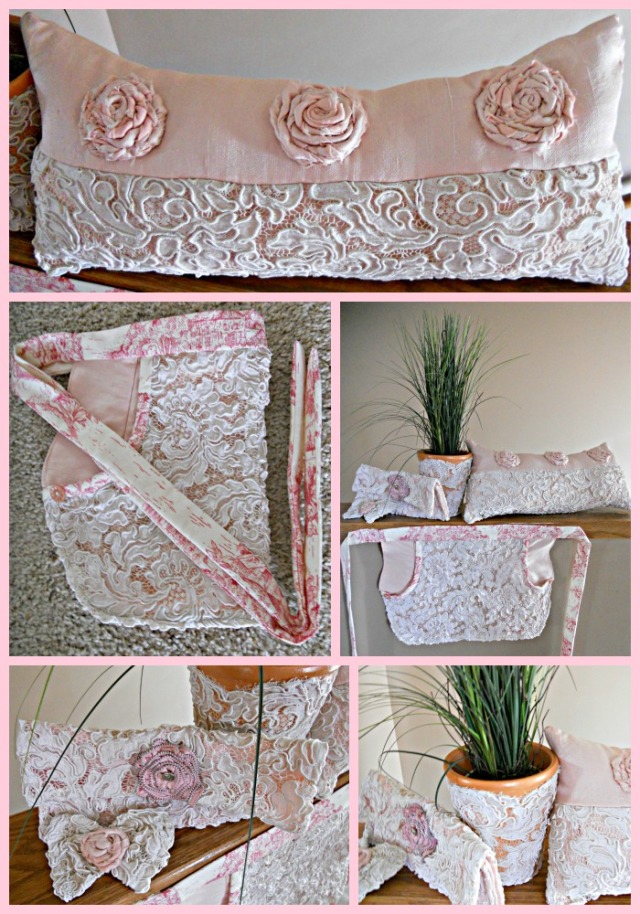
Can you believe that she sewed it on her own using a pattern from One-Yard Wonders??  And she did it with a recycled vintage dress, which she was able to transform into 5 amazingly crafty projects!

She took fabric from this:

…to all this!


The woman is so gifted it’s unbelievable!  Check out details on how she did it over on her blog.

I’m so happy the apron is now mine! :-)

Tell me in the comments what you are happy about this beautiful Friday!

Xo, Laura

Compost Yourself


photo (15)

Notice anything different kitchen-wise from the post two days ago?  Let me help with a side-by-side comparison!

Hiding next to the sink is this little cutie!

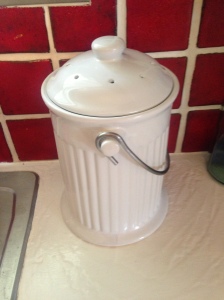
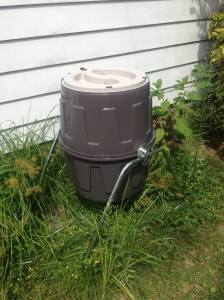
photo (16)We’ve started to compost!

What does that mean, exactly?  We now save the majority of our food scraps (and some other goodies) in the above ceramic bucket from World Market.  I chose that particular compost container because it blends in so well with the countertops, and it received excellent reviews online.  Plus, it was only $14.99 to boot!  Can’t beat the price!

Even though it’s small, the countertop bucket doesn’t fill up for a good 3 to 4 days, at which point we then take it outside to put it in our giant composter:

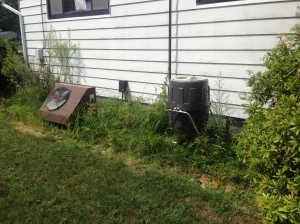
image (49)We’ve “hidden” the compost on the side of the house in a bunch of weeds so that it is not blatantly obvious (it’s not unattractive, but it doesn’t exactly match the house).

image (48)Sidenote: please check out how old that central air unit is!  Crazy, huh??

We went with the Suncast Tumbler composter because of its portability.  When we move out of this rental, we’d like to be able to hose the composter down and move it with us.  Because we were specifically looking for one that could be moved, we were slightly limited in options, and ended up shelling out $98.  However, there are so many composters on the market, and you can find one much more reasonable!  If you live in a house, I suggest looking at making your own out of a few pallets.  Or you can simply buy one of these outdoor composters (hover over each picture for pricing):

And if you live in an apartment, you might want to consider keeping one of these around (they can be kept indoors!):

Basically, the cliff notes of composting is that there are things you can compost and things you cannot.

Compostable items include:

Table scraps

Fruit and vegetable scraps

Chicken/rabbit manure

Coffee grounds

Tea leaves

Grass clippings

Garden plants

Lawn & garden weeds

Flowers, cuttings

Seaweed and kelp

Eggshells

Leaves

Straw or hay

Pine needles

Wood ash

Cardboard

Corn cobs, stalks

Dryer lint

Wood chips

Sawdust

Non-compostable items include:

Meat, fish, animal fats and bones

Fatty foods (dairy products, sauces, salad dressing, cooking oil)

Newspapers/office paper

BBQ ashes

Dog/cat poo (this is a big frowny face :-( for us…)

Plants that have gone to seed or are diseased

Salted foods

Black Walnuts

Doesn’t it feel good to help the planet?!

Xo, Laura

Did you love this post?  If so, check out the following related links!

4 Urban Composting Ideas (fullbloomhydroponics.net)
Maintaining Proper Airflow in Compost (wegotleaves.wordpress.com)
Organic Composting Ideas You Should Try (fullbloomhydroponics.net)
Composting 101 (greenlilies.com)
Composting is the New Cool (kitchenwarenews.wordpress.com)

P & B (No Jelly)
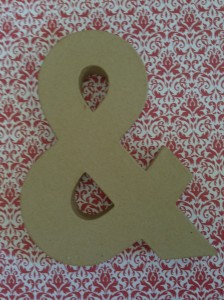
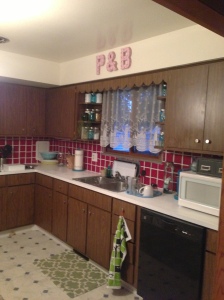
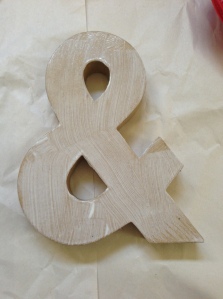
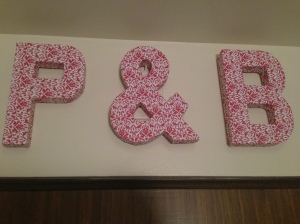
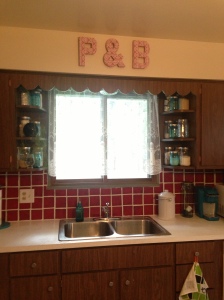
image (42) I am going to be quite honest… I am still stumped as to how to make this kitchen look decent (you can see me slowly improving it here, here, and here).  But in the meantime, I’ve decided to make it at least look like OURS.  So when I found some cardboard letters for 30% off at Hobby Lobby ($1.73 each), I decided to take the letters for a kitchen test spin.  In the above picture, you can see how great they look above the sink.  And in the below picture, you can see how great they look on their own! photo (11) Wanna know how I did it?  Follow along as I work on the ampersand! image (43) Step 1: Gather your materials.  For this project, you will need some cardboard letters, scrapbook paper, scissors, Mod Podge glue, and a brush for application.  I poured my glue into a bowl (I know, I know… not exactly eco-friendly, but it made clean-up so easy!).

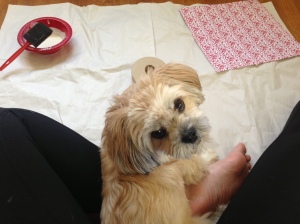
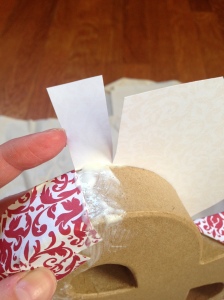
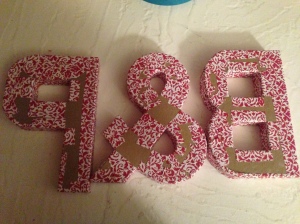
Step 2 (OPTIONAL): Make sure you have a little dog on your lap to help with the project. image (45)Step 3: Apply a thin coat of glue to the largest flat surface on the cardboard letter.  Place the sheet of scrapbook paper on top and smooth in place. image (44) Step 4: This is the hard part.  And also the most slow-going.  You need to cut the paper in order to fold it down over the sides.  This is much easier if you’re working on a shape with straight edges, like L or E.  But with rounded edges, you just have to go slowly and make sure you smooth the sides out as carefully as possible.  With the ampersand, I found it easiest to cut the paper in about 1 inch increments, lay down some glue, and fold it over into place.  You’ll need to do the same with any holes (in letters such as P or B), and this may even involve adding separate scraps of paper.  For this reason, I was happy I chose a pattern that doesn’t really need to match up perfectly (this would be much more difficult with patterns like polka dots or stripes). image (39) Step 5: Once you’ve covered up the front, sides, and any holes with scrapbook paper, it’s your decision whether or not you want to completely Mod Podge over the whole she-bang (for instance, if you want it to be glossy).  I decided to skip this step, and simply left the letters out for 2 hours to dry. Step 6: Turn the dry letters over and put 3M velcro strips on the back. image (40) You can see in the above picture that I overlapped the scrapbook paper around to the back in order to leave the edges looking clean and smooth.

Step 7: Hang them in place, and you’re all set! image (41)But why did I chose ‘P’ and ‘B’?  They’re the initials of both mine and Mike’s last names.

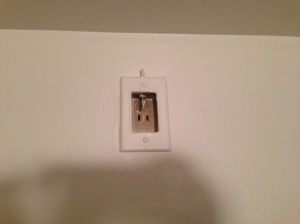
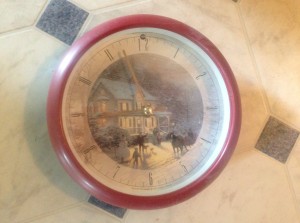
And why did I decide to put something above the sink?  First of all, the wide-open strip is practically begging for some kind of decoration.  But more practically, SOMETHING had to go there, since there was a random 2-prong outlet embedded awkwardly right above the sink. image (38) The landlords had placed an ugly, awkward, non-working clock to cover up the outlet.  Even though its redness matched our tomato of a kitchen, the clock wasn’t working for me.  Take a look for yourself at how dingy and blah it is:

photo (14)

Needless to say, it had to go.  And I am so much happier with the space above the sink now!  What do you think?

image (42)

Xo, Laura

Oh, Gus…

The weather in Ohio sucks today.  Rain.  Lots of it.  And lots of flooding, too.

My boss was definitely affected by the weather… he was in a particularly bad mood.

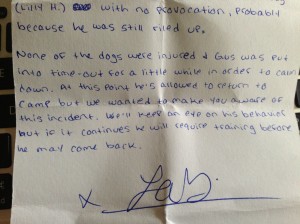
Because I had to work all day, I took Gus and Phoebe to doggie day camp.  Turns out, Gus was ABSOLUTELY feeling the bad weather energy, because he went all Kujo on not one, but TWO dogs at doggie day camp.  Apparently his fellow campers, Rowdy and Lilly H, were threatening him by minding their own business.  This is my favorite paragraph from the summary I had to sign.

photo (8)They also made a note that Gus was so active he did not nap today:

photo (9)

So that’s exactly what he’s doing right now!

image (32)

You’re going to have to forgive me, but tonight I am far too cranky to do anything other than read How to Raise the Perfect Dog by Cesar Millan in the bathtub while drinking  wine (please no flight delays tonight!  I need Mike home!).

But I promise that I AM working on painting a bookshelf, and I promise to show you tomorrow how I made some adorable “art” for the kitchen.  We’ve also got some serious organization happening in the pantry right now.  Lots of goodies to look forward to!

Misery loves company, so please let me know if any of you have been feeling the bad juju in the air today!  I hope everyone has a fantastic, restful evening tonight!  And keep in mind, tomorrow is FRIDAY!  :-)

Xo, Laura

Chalk It Up to Organization

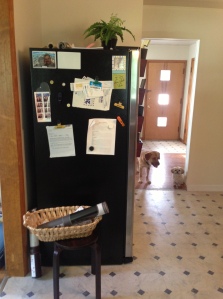
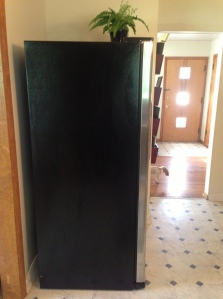
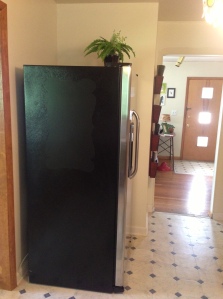
Continuing on the quest to get this kitchen in tip-top condition (you can see some other progress here and here), I’ve moved on to the side of the fridge, which I turned from Exhibit A into Exhibit B.

The reason for this switch is probably fairly obvious… it was all too cluttered, lacked organization, and was essentially useless.  Also, very ugly.

photo (7)

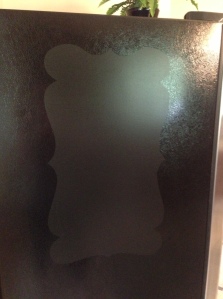
It all began yesterday in Target (doesn’t it always??), when I saw a chalkboard stick-on decal.  But it was far too busy and young-looking, so I continued the hunt.  Fast forward to this afternoon at Hobby Lobby, when I saw a simple black chalkboard cut-out from Designer Wall Accents.  Originally $22.99, it was 50% off, making it only $11.50!  It even came with its very own stick of chalk.  I loved that it was black, because I wanted it to mostly blend in with the side of our fridge.

But before I could apply the fully-removable chalkboard sticker, I needed to clear everything away.  I have no idea why the stool and basket were there in the first place, so they were the first things to go.  Everything else was removed as well, and I wiped the fridge down with paper towels and water to get a clean, fresh surface.

image (22)

And then, just like a normal sticker, the chalkboard decal is easy to peel off and slap on.  It did rip in 2 tiny places, but you absolutely cannot tell against the black backdrop of the fridge.  Here is the appliance with its new chalkboard sticker!

image (31)

See how well it blends in?!  You can barely see it, which is exactly what I wanted.  Here’s a closer shot:

image (30)

And then with a few additional adjustments, I turned it into this:

image (24)1 more day until Mike comes home! <3

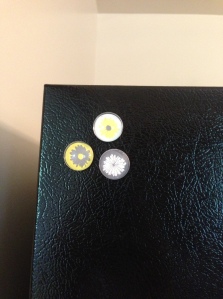
I added back in only 5 magnets; 2 clear heart magnets that my friend Emily gave me few years back (originally from Ikea), and a cluster of 3 cute magnets I bought last year at Target for $1.

image (28)

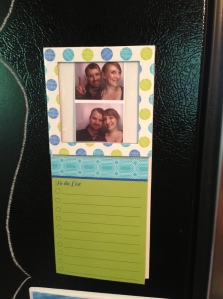
I slapped up a photo of Mike and I in Boston (it’s in a clear plastic magnet-backed frame from Dollar Tree), and our To-Do List, which is outfitted with two frames from a photo strip we also took in Beantown.  You may have noticed that this list read “I love the band U2” in the ‘before’ photo.  I do not particularly like them (at all…), but it was a cute little inside joke between Mike and I.

image (26)

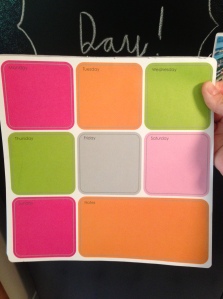
Then I topped off the fridge with an organizer I purchased a few months ago at Office Depot, and spray painted it a dark green called Hosta from Krylon.  I don’t intend to keep it up there permanently, but for now it serves as a good chalk holder until I can find something better.  Also in the organizer is a black Sharpie and a cute weekly planner notepad I found a few years ago:

image (23)

I often use a sheet from this notepad to plan out my week (when I need to make dog food, what I need to do at work, the projects I plan to do around the house…).

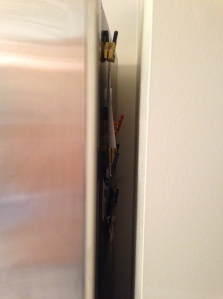
But where did the other papers and magnets go?  I hid them on the other side of the fridge, against the wall.  When we need extra magnets or need to access one of the coupons that originally hung on the other side of the fridge, they are within reach.  Inconspicuous reach!

image (25)

Not bad for a 10 minute makeover, eh?

Xo, Laura

How the Disorderly Became Orderly

image (17)

I love organization.

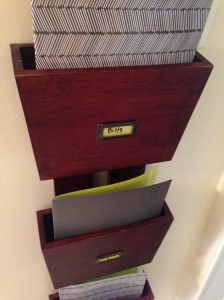
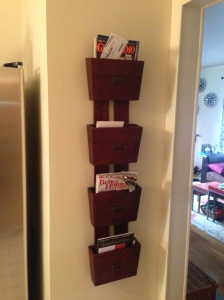
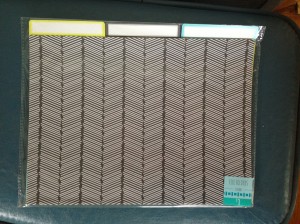
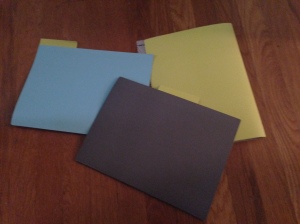
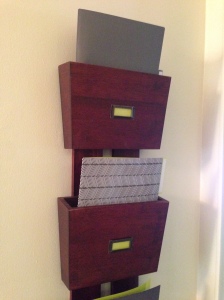
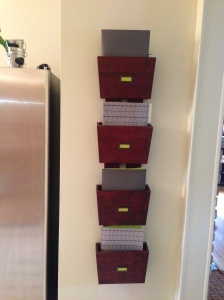
The last time I was home visiting my parents in Connecticut, they loaded up my car with things that no longer fit with their home’s decor.  I was lucky enough to snag a mail organizer that my mom bought at TJMaxx for $39.99 many years ago.  Mike mounted it on the wall in kitchen, before the pass-through to the living room, and there it remained in all it’s disorderly glory for about a month. photo (6)I had no idea how to organize this… I kept shifting and re-ordering the mail in the slots, but everything looked too messy.  And then Mike made a simple suggestion that we give some order to the slots by putting like with like (top slot for Mike’s mail, 2nd slot for bills, 3rd and 4th slots for whatever I wished). I was in Target for a hot minute before I spotted some adorable file folders in the Dollar Spot.  At 3 folders for $1, they couldn’t be more of a steal! image (18) And they even look cute turned inside out. image (19)I wanted a greater sense of cohesion in the mail slots, so I alternated between the herringbone pattern, and dark gray.  About 4 magazines or a million bills can fit inside one while still maintaining the shape.  The insides of all 4 of my files are lime green, so I cut out 4 “labels” using a 5th lime green file.  They slid down into place, and suddenly all was right with the world! image (20)But these bad boys still needed to actually be identified.  The folders are glossy, so I used a dry erase marker on the makeshift labels, hoping that if the contents of a slot changed, we could easily adjust the label.  And I was right, it works perfect! image (17)   image (21)No more unsightly wrinkled mail!  Hello, glorious organization!

Xo, Laura


Laura’s Stairway to Heaven

Some exciting stuff went down around here today:

photo (4)

But to start with, times are hard around here without Mike.  Gus and Phoebe have been breaking the rules left and right.  Actually, Gus was extremely helpful last night, when he woke Phoebe and I up at 4 am to notify us that the Wall Street Journal delivery man was actually a Dexter-style serial killer.  I may or may not have been extremely grouchy.

But I DID get to FaceTime with my sweetheart tonight!  Sometimes he talks, but most of the time I talk:

And in other exciting news, I finally took care of our boring stair situation.

Natural wood is beautiful, but too much can be too boring.  And I LOVE the way that painted stairs look:

(More examples can be seen on BHG, Real SimplePickleePainted Therapy and Bees Knees Bungalow.)

I wanted to replicate the look of painted stairs, but I needed it to be renter friendly…. especially since our landlord’s ONE inflexible mandate was that we not touch ANY of the real wood (fake wood paneling excluded) in the house.  I knew that contact paper was the solution.

The only problem I faced was what color/pattern of contact paper to use.  I’ll save you the soul searching I went through to arrive at a decision, but ultimately I chose to go with plain white contact paper.  I decided against any colors or patterns because I worried they would detract from everything going on in the living room and kitchen, two rooms visible from the stairs.  And actually, I initially decided to go with beige contact paper to match our antique white walls.  But on second glance, the color was too far off to actually be pulled off.  White has always been the classic color for painted stairs, so I figured it would work for us.

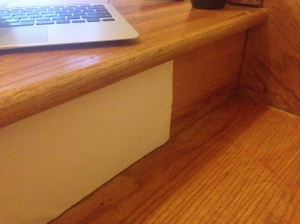
I set to work with a roll of white contact paper purchased for a little under $8 at Lowe’s, a pair of scissors, and an exacto knife.  The look is extremely easy to replicate, since all you need to do is measure the stair, cut the paper, line it up, and pop it in place!  Because the contact paper is fully removable, you can lift it back up to smooth out any bumps.  Or you can simply take the easy way out and piece any air bubbles with a needle, then smooth the spot over.

Occasionally you may mess up and cut a piece that’s much too short without knowing quite how you did it (was it that glass of wine?).

image (14)But you can just peel it off and start anew.  Eventually, you end up with the most beautiful thing you’ve ever seen: a 100% renter-friendly, faux painted staircase!